Blog

  • Windows 12 AI Features and Smart Integration Guide

    Windows 12 AI Features and Smart Integration Guide

    Windows has always evolved with the way people use computers. From simple task management in earlier versions to the highly visual and cloud-connected experience of Windows 11, each update has brought something meaningful. Now, Windows 12 is expected to take a major leap forward by deeply integrating artificial intelligence into the core of the operating system.

    This is not just about adding a few AI tools on top. Windows 12 is shaping up to be a system where AI works quietly in the background, learns from your habits, and actively helps you get things done faster. For everyday users, professionals, and creators, this shift could change how computers are used on a daily basis.

    A New Era of AI First Operating Systems

    Windows 12

    The biggest change with Windows 12 is the move toward an AI first design. Instead of treating AI as an optional feature, Microsoft is expected to build it into the foundation of the system. This means your PC will not only respond to commands but also anticipate what you need.

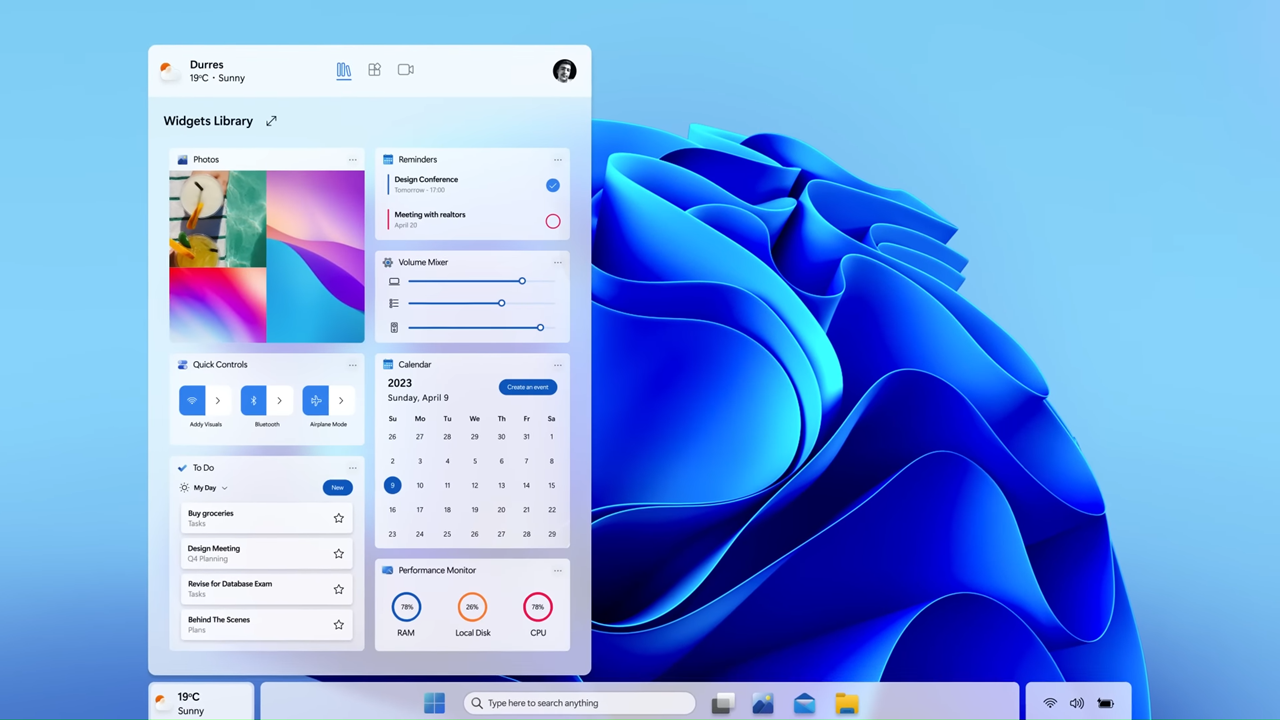
    Imagine opening your laptop in the morning and seeing a personalized dashboard that already suggests files, emails, and tasks based on your routine. If you usually check reports or attend meetings at a certain time, Windows 12 could prepare everything in advance without you having to search for it.

    This kind of smart interaction reduces time spent navigating menus and increases focus on actual work.

    Built In AI Assistant Across the System

    Windows 12 is likely to expand the role of AI assistants beyond what users have seen before. Instead of being limited to a single app, the AI assistant will be available system wide.

    This assistant can help with:

    • Writing emails or documents directly inside apps
    • Summarizing long files or web pages
    • Managing schedules and reminders
    • Answering questions without opening a browser

    For example, if you are working on a document, you can ask the AI to rewrite a paragraph, correct grammar, or even adjust the tone. The assistant becomes part of your workflow rather than a separate tool.

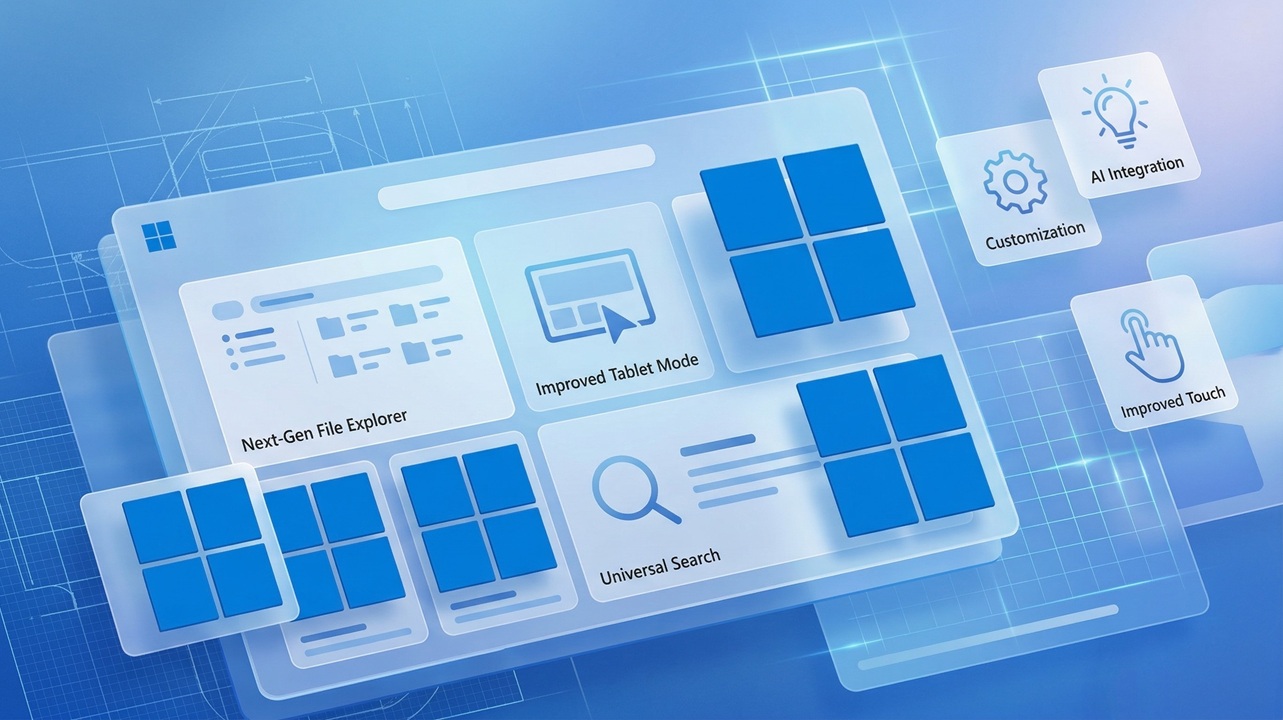
    Smart File Management and Search

    Searching for files has always been a challenge, especially when folders are cluttered. Windows 12 aims to solve this with AI powered search that understands context instead of just file names.

    You could type something like “presentation I worked on last week about marketing” and the system would locate the correct file instantly. This is possible because AI can analyze content inside files, not just their titles.

    File organization is also expected to improve. The system may automatically sort documents, images, and downloads into meaningful categories based on how you use them.

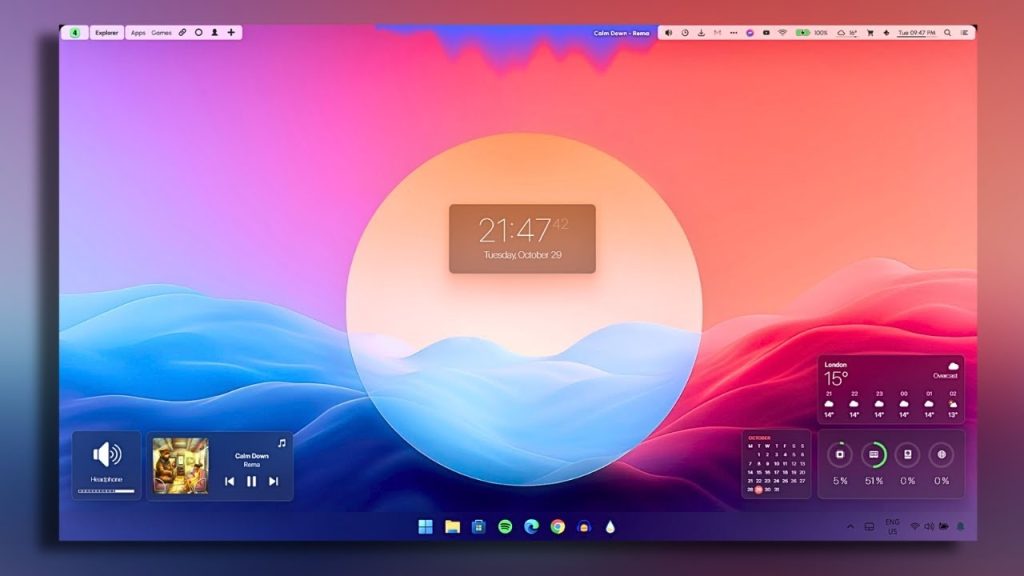
    Personalized User Experience

    One of the most practical uses of AI in Windows 12 is personalization. The system can learn your behavior over time and adjust settings automatically.

    This includes:

    • Adjusting brightness and performance based on usage
    • Recommending apps you might need during specific tasks
    • Prioritizing notifications that matter most
    • Customizing layouts for different workflows

    For instance, if you switch between work and entertainment modes, Windows 12 could change layouts, open relevant apps, and optimize system performance without manual adjustments.

    AI Powered Security Enhancements

    Security is another area where AI integration can make a real difference. Windows 12 is expected to use AI to detect unusual behavior and prevent threats before they cause damage.

    Instead of relying only on traditional antivirus scans, the system can monitor patterns in real time. If something unusual happens, like an unknown app trying to access sensitive data, the system can block it instantly.

    This proactive approach helps users stay protected without needing deep technical knowledge.

    Improved Performance and Resource Management

    AI can also play a key role in managing system resources. Windows 12 may use machine learning to understand which apps you use the most and allocate resources accordingly.

    This means:

    • Faster app launches
    • Better battery life on laptops
    • Reduced background processes
    • Smoother multitasking

    For example, if you often use a browser and a design tool together, the system can prioritize those apps to ensure they run smoothly.

    Seamless Integration with Cloud and Devices

    Modern computing is not limited to a single device. Windows 12 is expected to strengthen integration with cloud services and other devices.

    AI can help sync your work across devices in a smarter way. If you start a document on your PC and later switch to a tablet or phone, the system can pick up exactly where you left off.

    This continuity creates a more connected experience, especially for users who work across multiple platforms.

    Smarter Updates and Maintenance

    System updates are often seen as interruptions, but Windows 12 Iso File may change that experience. With AI, updates can be scheduled based on your usage patterns.

    Instead of restarting your PC at inconvenient times, the system can choose moments when you are less active. It can also optimize updates to reduce installation time.

    Maintenance tasks like disk cleanup and performance checks can happen automatically in the background.

    AI for Creativity and Content Creation

    Creators will likely benefit significantly from AI integration in Windows 12. Whether you edit videos, design graphics, or write content, AI tools can speed up the process.

    Possible features include:

    • Automatic image enhancement
    • Video editing suggestions
    • Real time transcription and translation
    • Content generation assistance

    These tools can help beginners get started while also saving time for experienced users.

    Accessibility and Inclusive Design

    AI has the potential to make technology more accessible. Windows 12 is expected to include smarter accessibility features powered by AI.

    This could involve:

    • Voice based navigation for hands free control
    • Real time captions for audio and video
    • Text to speech with natural sounding voices
    • Visual assistance for users with impairments

    Such features ensure that more people can use computers comfortably and efficiently.

    Challenges and Considerations

    While AI integration offers many benefits, it also raises important questions. Privacy is one of the biggest concerns. Since AI systems rely on user data to learn and improve, it is essential to ensure that this data is handled securely.

    Users will likely want control over how much data is collected and how it is used. Transparency from Microsoft will be key in building trust.

    Another consideration is system requirements. Advanced AI features may require more powerful hardware, which could limit access for users with older devices.

    What This Means for Everyday Users

    For most people, the shift to AI powered computing will feel gradual rather than overwhelming. You might first notice small improvements, like better search results or smarter suggestions. Over time, these features will become part of your daily routine.

    The goal is not to replace human effort but to reduce repetitive tasks and make technology more intuitive. Whether you are a student, professional, or casual user, Windows 12 aims to simplify how you interact with your computer.

    The Future of Windows with AI

    Windows 12 represents more than just another update. It signals a broader shift toward intelligent systems that adapt to users instead of forcing users to adapt to them.

    As AI continues to evolve, future versions of Windows could become even more personalized and efficient. Tasks that once required multiple steps might be completed with a single command or even automatically.

    This transformation is still unfolding, but one thing is clear. The role of AI in operating systems is only going to grow, and Windows 12 is set to lead that change.

  • Hidden Features in Windows 12 You Should Know

    Hidden Features in Windows 12 You Should Know

    Windows updates often grab attention for their big visual changes and new apps, but the real value usually lies beneath the surface. With Windows 12, Microsoft has quietly introduced a range of features that many users either overlook or never discover. These hidden tools can improve your workflow, strengthen your privacy, and make everyday tasks feel smoother.

    If you have recently upgraded or are planning to, this guide walks you through the lesser known features that are actually worth your time.

    Smart Taskbar Customization

    Windows 12

    At first glance, the Windows 12 taskbar looks familiar, but it has gained a layer of intelligent customization. You can now resize icons dynamically based on usage patterns. The system automatically highlights apps you use most, making them easier to access without manual pinning.

    There is also a new adaptive grouping system. Instead of stacking apps randomly, Windows organizes them based on how you work. For example, if you often open a browser with a note taking app, they will start appearing together.

    To access this, right click the taskbar, open settings, and explore the personalization options. It is subtle, but once you notice it, your navigation becomes faster.

    Built In AI Assistant Across Apps

    Windows 12 goes deeper with AI integration. Unlike previous versions where AI felt like an add on, it is now embedded into the operating system.

    You can highlight text anywhere and get instant summaries, rewrite suggestions, or quick answers without opening another app. It works inside documents, browsers, and even file names.

    This feature is especially useful for content creators, students, and professionals who deal with large amounts of text daily. Instead of switching between tools, everything happens in one place.

    Advanced Snap Layout Memory

    Snap layouts are not new, but Windows 12 improves them in a way that feels natural. The system now remembers your preferred layouts for specific tasks.

    If you usually keep your browser on the left and a spreadsheet on the right, Windows will automatically suggest or restore that layout when you reopen those apps.

    This small improvement saves time and reduces friction during multitasking. It feels like the system understands your habits.

    Energy Saver with Intelligent Control

    Battery optimization has become smarter. Windows 12 introduces an energy saver mode that does more than just reduce brightness.

    It learns your usage patterns and limits background activity for apps you rarely use. At the same time, it ensures that important apps keep running smoothly.

    On laptops, this can noticeably extend battery life without affecting performance in a major way.

    Hidden Privacy Dashboard

    Privacy settings have been redesigned and expanded. There is now a centralized dashboard where you can see which apps access your camera, microphone, location, and files.

    What makes it useful is the real time activity tracking. You can instantly spot if an app is using permissions in the background and disable it with one click.

    For users concerned about data security, this feature adds transparency that was missing in earlier versions.

    Voice Access Improvements

    Voice control in Windows 12 feels more practical than before. You can now navigate the entire system using voice commands with better accuracy.

    Opening apps, switching windows, typing text, and even editing documents can be done hands free. The system supports natural language, so commands feel less robotic.

    This is helpful not only for accessibility but also for multitasking when your hands are occupied.

    Quick Settings Redesign

    The Quick Settings panel has been refined to be more useful. Instead of fixed toggles, you can now customize what appears based on your needs.

    You can add controls for Bluetooth devices, focus mode, network settings, and more. It turns the panel into a mini control center that adapts to your daily routine.

    Many users ignore this section, but spending a few minutes customizing it can save hours over time.

    Focus Mode with Deep Integration

    Focus mode is no longer just a timer. It now connects with apps, notifications, and even your calendar.

    When activated, it can silence distractions, pause notifications, and create a clean workspace. It also tracks your focus sessions and provides simple insights into your productivity patterns.

    If you struggle with distractions, this feature is worth exploring.

    File Explorer Tabs with Smart Search

    File Explorer has received meaningful upgrades. Tabs make it easier to manage multiple folders, but the real improvement is in search.

    The new search system understands context. You can type phrases like documents from last week or images larger than 5MB, and it will show relevant results.

    This saves time compared to manually filtering files and folders.

    Background App Control

    Windows 12 gives you better control over which apps run in the background. You can individually manage permissions and resource usage.

    This is particularly useful for improving system performance. By limiting unnecessary background processes, your PC can run faster and more efficiently.

    Auto Cleanup and Storage Optimization

    Storage management has become more automated. The system can now detect duplicate files, temporary data, and unused apps.

    It suggests what you can safely remove and can even handle cleanup automatically if you enable the feature.

    For users who often run out of storage, this can make a noticeable difference.

    Hidden Gesture Controls

    On touch enabled devices, Windows 12 introduces new gesture controls that are not immediately obvious.

    You can swipe between apps, access quick settings, or minimize windows with simple gestures. These controls make navigation faster and more intuitive once you get used to them.

    Dynamic Refresh Rate Control

    For devices with high refresh rate displays, Windows 12 includes dynamic adjustment. The system changes the refresh rate based on what you are doing.

    For example, it uses a higher rate while scrolling or gaming and lowers it during static tasks to save power.

    This improves both performance and battery efficiency without requiring manual changes.

    Secure App Sandbox

    Security has been improved with a sandbox feature for unknown apps. When you install a new application, you can run it in an isolated environment.

    This prevents potential threats from affecting your system. It is especially useful when testing software from unknown sources.

    Clipboard History Upgrade

    Clipboard history is more powerful now. You can store multiple items, including text and images, and access them later.

    It also syncs across devices if you use the same Microsoft account. This makes it easier to move content between devices without extra tools.

    Why These Hidden Features Matter

    At first, these features may seem small, but together they shape how Windows 12 Iso Download feels in daily use. They reduce repetitive tasks, improve speed, and give you more control over your system.

    Most users stick to default settings and miss out on these improvements. Taking time to explore them can completely change your experience.

    Final Thoughts

    Windows 12 is not just about visual updates or new apps. Its real strength lies in the details that quietly improve how you work and interact with your computer.

    From smarter multitasking to better privacy controls, these hidden features show how the operating system is evolving to match real user behavior.

    If you want to get the most out of Windows 12, do not stop at the surface. Explore the settings, try new tools, and adjust the system to fit your workflow. Once you do, you will start noticing how much smoother everything feels.

  • Windows 12 ISO Download Guide and Setup

    Windows 12 ISO Download Guide and Setup

    If you are planning to upgrade your system or install a fresh operating system, Windows 12 has quickly become one of the most talked about releases. With improved performance, deeper AI integration, and a cleaner interface, many users are actively searching for a safe way to download and install it.

    The challenge is simple. There is a lot of confusion online. Some websites offer unofficial ISO files, others provide outdated methods, and many guides skip important steps. This guide keeps things clear and practical so you can download the Windows 12 ISO safely and set it up without unnecessary risks.

    What is Windows 12 ISO

    Windows 12 ISO

    Before jumping into the download process, it helps to understand what an ISO file actually is. A Windows ISO is a complete image of the operating system. It contains all the files needed to install Windows from scratch.

    Think of it as a digital copy of the installation DVD. Instead of using physical media, you use a USB drive or virtual setup to install the system.

    For Windows 12, the ISO file allows you to:

    • Perform a clean installation
    • Upgrade from an older Windows version
    • Install Windows on a new PC
    • Create a bootable USB for recovery or setup

    Is Windows 12 Officially Available

    Here is where things get important. At the time of writing, Microsoft has not widely released a final public version labeled as Windows 12 in all regions. What you may find are:

    • Insider preview builds
    • Leaked or modified ISO files
    • Early testing versions

    Downloading from unofficial sources can expose your system to malware or unstable builds. So the safest approach is always to rely on Microsoft or trusted developer channels.

    If Microsoft releases an official ISO, it will be available through:

    • Microsoft official website
    • Windows Insider Program
    • Media Creation Tool or similar utilities

    System Requirements for Windows 12

    Before downloading the ISO, check if your system can handle the upgrade. While exact requirements may vary, most systems compatible with Windows 11 are expected to support Windows 12.

    Typical requirements include:

    • 64 bit processor with modern architecture
    • Minimum 8 GB RAM recommended
    • SSD storage for better performance
    • TPM 2.0 support
    • Secure Boot enabled

    If your system already runs Windows 11 smoothly, chances are high that it can handle Windows 12 without issues.

    How to Download Windows 12 ISO Safely

    Downloading the ISO file the right way is the most critical step. Here is a safe and practical approach.

    Method 1 Using Microsoft Insider Program

    If Windows 12 preview builds are available, follow these steps:

    1. Visit the official Microsoft Insider website
    2. Sign in with your Microsoft account
    3. Join the Insider Program
    4. Select the Dev or Canary channel
    5. Download the ISO file from the official dashboard

    This method ensures you are getting a legitimate version directly from Microsoft.

    Method 2 Using Windows Update

    Sometimes Microsoft rolls out preview builds through Windows Update instead of direct ISO downloads.

    1. Open Settings
    2. Go to Windows Update
    3. Join Insider Preview
    4. Download the latest available build

    After installation, you can create an ISO manually if needed.

    Method 3 Media Creation Tool Alternative

    If Microsoft releases a dedicated tool for Windows 12, it will work similar to previous versions.

    • Download the tool from Microsoft
    • Select Create Installation Media
    • Choose USB or ISO file
    • Follow the on screen instructions

    Avoid third party ISO download sites unless you are absolutely sure about their authenticity.

    Creating a Bootable USB Drive

    Once you have the ISO file, the next step is to prepare a bootable USB drive. This allows you to install Windows on any compatible system.

    What You Need

    • USB drive with at least 8 GB space
    • Windows 12 ISO file
    • Bootable tool like Rufus or official Microsoft tool

    Steps to Create Bootable USB

    1. Insert your USB drive
    2. Open Rufus or similar tool
    3. Select the ISO file
    4. Choose GPT partition scheme for modern systems
    5. Click Start and wait for completion

    After this, your USB is ready for installation.

    How to Install Windows 12 Step by Step

    Now comes the main part. Installing Windows 12 Iso Download is straightforward if you follow each step carefully.

    Step 1 Enter BIOS or Boot Menu

    Restart your computer and press the boot key. This is usually F2, F12, DEL, or ESC depending on your device.

    Select the USB drive as the boot device.

    Step 2 Start Windows Setup

    Once the system boots from USB:

    • Choose language and region
    • Click Install Now
    • Enter product key or skip

    Step 3 Choose Installation Type

    You will see two options:

    • Upgrade existing Windows
    • Custom installation

    For a fresh start, choose Custom.

    Step 4 Select Drive

    • Choose the partition where Windows will be installed
    • Format if needed
    • Click Next

    Windows will begin copying files and installing features.

    Step 5 Complete Setup

    After installation:

    • Set up your Microsoft account
    • Choose privacy settings
    • Configure preferences

    Within a few minutes, your Windows 12 desktop will be ready.

    Clean Install vs Upgrade

    This is a common question. Should you upgrade or perform a clean install?

    Upgrade

    • Keeps your files and apps
    • Faster process
    • May carry old bugs or clutter

    Clean Install

    • Fresh system performance
    • Removes unnecessary files
    • Requires backup before installation

    If your system feels slow or cluttered, a clean install is usually the better option.

    Common Issues and Fixes

    Even with a proper guide, some users run into issues. Here are a few common problems and simple fixes.

    Bootable USB Not Detected

    • Check BIOS boot order
    • Recreate USB using correct settings
    • Try a different USB port

    Installation Stuck

    • Wait at least 20 minutes before restarting
    • Disconnect unnecessary peripherals
    • Ensure ISO file is not corrupted

    TPM or Secure Boot Error

    • Enable TPM in BIOS
    • Turn on Secure Boot
    • Update BIOS if needed

    Tips for a Smooth Installation

    A few small steps can save a lot of trouble later.

    • Backup important files before starting
    • Use a reliable USB drive
    • Keep your device plugged in during installation
    • Disconnect external drives to avoid confusion
    • Download latest drivers after installation

    Is It Worth Installing Windows 12 Now

    This depends on your goal.

    If you enjoy testing new features and do not mind occasional bugs, preview builds can be interesting. You get early access to new tools, improved UI, and AI driven features.

    If you need stability for work or daily use, waiting for the official stable release is the smarter choice. Early builds can have compatibility issues with apps and drivers.

    Final Thoughts

    Downloading and installing Windows 12 is not complicated, but doing it the right way matters. The biggest mistake users make is rushing into unofficial downloads without checking the source.

    Stick to trusted methods, prepare your system properly, and follow each step carefully. Whether you are upgrading or starting fresh, a clean and safe installation ensures better performance and fewer problems later.

    If you are planning to try Windows 12, start with a backup, choose the correct method, and take your time during setup. A little patience at the beginning can save hours of troubleshooting later.

  • Windows 12 UI Leaks and New Design Explained

    Windows 12 UI Leaks and New Design Explained

    The idea of Windows 12 has been quietly building momentum for a while now. Even though Microsoft has not officially revealed everything, leaks, insider reports, and early previews are already giving us a surprisingly clear picture of what is coming next. And if these glimpses are anything to go by, Windows 12 is not just another update. It looks like a complete rethink of how the Windows experience should feel in a modern world.

    If you have used Windows 10 or even Windows 11, you might remember how each version tried to modernize the interface while keeping familiar elements intact. Windows 12 appears to go further. It is shaping up to be cleaner, more adaptive, and heavily influenced by AI-driven interactions.

    Let’s break down everything we know so far about Windows 12 UI leaks and what they actually mean for everyday users.

    A Fresh Look That Feels Familiar

    One of the most talked-about leaks shows a redesigned desktop layout that looks noticeably different from anything we have seen before. Instead of the traditional layout where everything is anchored to the bottom, Windows 12 appears to experiment with a more flexible design.

    In some leaked screenshots, the taskbar is floating slightly above the bottom edge, giving the interface a lighter and more modern feel. The system tray is separated and positioned at the top corner in certain builds, which might remind some users of macOS or even ChromeOS.

    At first glance, this might seem like a drastic change. But when you look closer, it is still very much Windows. The Start menu, icons, and navigation patterns are still intuitive. Microsoft seems to be walking a careful line between innovation and familiarity.

    Floating Taskbar and Modular Layout

    The floating taskbar is not just a visual tweak. It represents a broader shift toward modular UI design. This means different parts of the interface can move, adapt, or even disappear depending on what you are doing.

    For example, when working in full-screen apps or focusing on productivity tasks, the interface may minimize distractions by hiding certain elements. On the other hand, when you are browsing or multitasking, those same elements can reappear in a more accessible way.

    This kind of flexibility could make Windows feel less cluttered and more responsive to user behavior.

    Smarter Widgets and AI Integration

    One of the most exciting aspects of Windows 12 UI leaks is the deeper integration of AI. Widgets are expected to become far more intelligent and context-aware.

    Instead of static information panels, future widgets might adapt based on your habits. For instance, if you regularly check the weather in the morning or track stock prices during work hours, the system could automatically highlight those widgets at the right time.

    AI could also play a role in organizing your desktop, suggesting app layouts, or even optimizing system performance based on how you use your computer.

    This is not just about convenience. It is about making the operating system feel like it understands you.

    A Cleaner, Minimalist Design Language

    Windows 11 introduced rounded corners, softer shadows, and a more polished design. Windows 12 seems ready to refine that approach even further.

    Leaked visuals suggest:

    • More transparency effects that feel subtle rather than overwhelming
    • Smoother animations that make transitions feel natural
    • Simplified icons with consistent styling
    • Reduced visual clutter across menus and settings

    The overall goal appears to be clarity. Instead of overwhelming users with too many visual elements, Windows 12 aims to present information in a calm and structured way.

    This might not sound revolutionary, but in daily use, these small changes can make a big difference.

    Redesigned Start Menu Experience

    The Start menu has always been the heart of Windows, and it looks like Microsoft is rethinking it once again.

    Early leaks suggest a more dynamic Start menu that could include:

    • Personalized recommendations based on usage
    • Better organization of apps and files
    • Integration with cloud services for quick access
    • Adaptive layout depending on screen size and device type

    For users who rely heavily on the Start menu, this could make navigation faster and more intuitive.

    Better Multi Device Experience

    Windows 12 is expected to focus heavily on seamless experiences across devices. Whether you are switching between a laptop, tablet, or even a foldable device, the UI is rumored to adapt automatically.

    This includes:

    • Layout changes based on screen size
    • Touch-friendly controls when needed
    • Smooth transitions between keyboard and touch input

    This adaptability is especially important as more users move between different types of devices throughout the day.

    Enhanced Snap Layouts and Multitasking

    Multitasking has always been one of Windows’ strongest features, and Windows 12 Download looks ready to take it further.

    Leaked features suggest improvements like:

    • More customizable snap layouts
    • AI-assisted window placement
    • Faster switching between tasks
    • Better support for multiple monitors

    Imagine opening a set of apps and having Windows automatically arrange them in the most efficient way. That is the kind of experience Microsoft seems to be aiming for.

    Performance Focus Behind the Scenes

    While the UI changes are getting most of the attention, there is also a strong focus on performance improvements.

    Reports suggest that Windows 12 may use a more modular system architecture. This could allow for:

    • Faster updates
    • Better security
    • Improved performance on both high-end and low-end devices

    For users, this means a smoother experience without needing constant hardware upgrades.

    Cloud and Web Integration

    Another noticeable trend in Windows 12 leaks is deeper integration with cloud services. Microsoft appears to be pushing toward a more connected ecosystem.

    This could include:

    • Faster syncing of files and settings
    • Better integration with Microsoft 365 apps
    • Web-based features that reduce dependency on local storage

    While this might raise concerns for some users, it also opens up possibilities for more flexible and accessible computing.

    What These Leaks Really Mean

    It is important to remember that leaks are not final. Features can change, designs can evolve, and some ideas may never make it to the final release.

    However, the overall direction is clear. Microsoft is moving toward a smarter, cleaner, and more adaptive operating system.

    Instead of focusing only on visual upgrades, Windows 12 seems to prioritize how users interact with their devices on a daily basis.

    Should You Be Excited About Windows 12

    If you enjoy trying new features and staying up to date with technology, Windows 12 is definitely something to watch. The combination of AI integration, modern design, and improved performance could make it one of the most significant Windows releases in years.

    At the same time, if you prefer stability and familiarity, it might be worth waiting until the official release and early updates settle things down.

    Either way, the changes coming with Windows 12 are not just cosmetic. They reflect a broader shift in how operating systems are evolving.

    Final Thoughts

    Windows 12 UI leaks give us an early glimpse into what could be the next big step for Microsoft’s operating system. From floating taskbars to AI-powered features, the focus is clearly on creating a more personalized and efficient experience.

    What stands out the most is how these changes aim to simplify rather than complicate. The design feels intentional, the features feel practical, and the overall direction feels aligned with how people actually use their devices today.

    As more details emerge, it will be interesting to see how these ideas come together in the final version. For now, one thing is clear. Windows 12 is not just about looking different. It is about working smarter in a world that expects more from every click, tap, and interaction.

  • Windows 12 DLSS Technology for Gaming Boost

    Gaming on PC has always been about pushing limits. Every year brings new hardware, better graphics, and higher expectations from players. But even the most powerful GPUs can struggle when games demand ultra settings, ray tracing, and high resolutions all at once. This is where DLSS technology enters the picture, and with the rumored evolution in Windows 12, it could redefine how gamers experience performance.

    If you have ever lowered your graphics settings just to keep your frame rate stable, you already understand the problem DLSS is trying to solve. It is not just about raw power anymore. It is about working smarter with the power you already have.

    What Is DLSS Technology

    DLSS stands for Deep Learning Super Sampling. It is an AI driven technology developed by NVIDIA that uses machine learning to upscale lower resolution images into higher resolution outputs.

    Instead of rendering every frame in full resolution, DLSS renders fewer pixels and then uses AI to reconstruct a sharper image. This reduces the load on your GPU while maintaining visual quality that often looks close to native resolution.

    In simple terms, DLSS lets your system do less work but still deliver impressive visuals.

    Why DLSS Matters More in Windows 12

    Windows 12 is expected to focus heavily on AI integration across the system. This includes better resource management, smarter GPU scheduling, and deeper compatibility with AI based technologies like DLSS.

    The difference is not just about enabling DLSS in games. It is about how the operating system supports and enhances it in the background.

    Here are a few reasons why DLSS could perform even better in Windows 12:

    Smarter Resource Allocation

    Windows 12 may prioritize gaming tasks more efficiently. That means DLSS can access GPU resources without unnecessary interruptions from background processes.

    AI Level Optimization

    With AI becoming part of the operating system itself, DLSS might benefit from system wide learning patterns. Over time, your PC could adapt to your gaming habits and optimize performance automatically.

    Improved Driver Integration

    Microsoft and NVIDIA are likely to work closely to ensure better driver level support. This can reduce latency and improve overall frame stability.

    How DLSS Improves Gaming Performance

    The biggest advantage of DLSS is the noticeable increase in frames per second. But there is more to it than just higher numbers.

    Higher FPS Without Sacrificing Quality

    DLSS allows games to run at lower internal resolutions. The AI then reconstructs the image, making it appear sharp and detailed. You get smoother gameplay without compromising visuals.

    Better Ray Tracing Performance

    Ray tracing is one of the most demanding features in modern games. DLSS helps offset that performance cost, making it possible to enjoy realistic lighting without massive frame drops.

    Reduced GPU Load

    When your GPU does less work per frame, it runs cooler and more efficiently. This can also extend the lifespan of your hardware.

    Smoother Gameplay Experience

    Higher and more stable frame rates lead to smoother gameplay. This is especially important in competitive games where every frame counts.

    DLSS Versions and Expected Improvements

    DLSS has evolved over time, and each version has brought significant improvements.

    DLSS 1.0 was a starting point but had noticeable image quality issues. DLSS 2.0 improved accuracy and visual clarity, making it widely accepted by gamers. DLSS 3 introduced frame generation, which creates additional frames using AI.

    With Windows 12, future DLSS updates could go even further.

    Possible improvements include:

    • Faster frame generation with reduced input lag
    • Better handling of fast motion scenes
    • Enhanced support for 4K and even higher resolutions
    • Improved compatibility across more games

    These advancements could make high end gaming more accessible even on mid range systems.

    DLSS vs Traditional Upscaling

    Before DLSS, upscaling methods were much simpler. They relied on basic algorithms that often resulted in blurry or pixelated images.

    DLSS is different because it uses trained AI models. It understands patterns, textures, and details in a way traditional methods cannot.

    The result is sharper images, better anti aliasing, and overall improved visual quality.

    When compared to other technologies like AMD FSR, DLSS still holds an edge in many scenarios due to its deep learning approach, although the gap has been narrowing.

    Real World Gaming Impact

    The benefits of DLSS are not just theoretical. Gamers have already seen major improvements in popular titles.

    Games that support DLSS often show:

    • 30 to 100 percent increase in frame rates
    • More stable performance in demanding scenes
    • Ability to enable ultra settings on weaker hardware

    With Windows 12 enhancing system level support, these benefits could become even more consistent across different games.

    Imagine playing a high end game at ultra settings without worrying about frame drops. That is the kind of experience DLSS aims to deliver.

    Hardware Requirements for DLSS

    DLSS is not available on all systems. It requires NVIDIA RTX graphics cards because it relies on Tensor Cores designed for AI processing.

    Compatible GPUs include:

    • RTX 20 series
    • RTX 30 series
    • RTX 40 series and beyond

    Windows 12 may improve compatibility and performance, but the core requirement of having an RTX GPU will likely remain.

    How to Enable DLSS in Games

    Using DLSS is usually simple. Most supported games include it in their graphics settings.

    Steps typically include:

    • Open game settings
    • Go to graphics or video options
    • Find DLSS or upscaling settings
    • Choose a mode such as Quality, Balanced, or Performance

    Each mode offers a different balance between image quality and performance.

    Quality mode focuses on visuals, while Performance mode prioritizes higher frame rates.

    Potential Limitations to Consider

    DLSS is powerful, but it is not perfect.

    Limited Game Support

    Not all games support DLSS. However, the number of supported titles continues to grow.

    Dependency on NVIDIA Hardware

    DLSS only works on RTX GPUs, which limits accessibility for users with other hardware.

    Visual Artifacts in Some Cases

    In certain scenarios, especially with older versions, minor visual issues can appear. These are becoming less common with newer updates.

    The Future of AI Powered Gaming

    DLSS is part of a larger shift toward AI driven gaming. As operating systems like Windows 12 Iso embrace AI, the line between software and hardware optimization continues to blur.

    In the future, we may see:

    • Fully AI optimized game settings
    • Real time performance adjustments
    • Enhanced realism with lower hardware requirements

    This means gamers will spend less time tweaking settings and more time actually playing.

    Why Windows 12 Could Be a Game Changer

    Windows has always been the backbone of PC gaming. With Windows 12, the focus appears to be shifting toward intelligent performance optimization.

    By integrating AI technologies like DLSS more deeply into the system, Microsoft could offer a smoother and more efficient gaming experience.

    For gamers, this translates into:

    • Better performance without constant manual tuning
    • Improved compatibility with modern gaming technologies
    • A more stable and responsive system overall

    Final Thoughts

    Windows 12 DLSS technology represents more than just a performance boost. It reflects the future direction of gaming where AI plays a central role in delivering better experiences.

    Instead of relying solely on hardware upgrades, gamers can now benefit from smarter software solutions. DLSS proves that you do not always need the most expensive setup to enjoy high quality gaming.

    As Windows 12 continues to evolve, DLSS could become an essential part of every gamer’s toolkit. Whether you are playing competitive shooters or exploring open world adventures, the promise is simple: smoother gameplay, better visuals, and a more enjoyable experience overall.

    For anyone serious about PC gaming, keeping an eye on DLSS developments in Windows 12 is not just interesting. It is necessary.

  • Fix Windows 11 Sound Not Working Fast

    Fix Windows 11 Sound Not Working Fast

    Few things are more frustrating than turning on your Windows 11 PC and realizing there is no sound. Whether you are trying to watch a video, join an online meeting, or simply listen to music, audio problems can completely ruin the experience.

    The good news is that most Windows 11 sound issues are not serious. In many cases, they are caused by simple settings, outdated drivers, or minor system glitches. With the right approach, you can fix the problem in minutes without needing technical expertise.

    This guide walks you through practical, real world solutions that actually work. No complicated jargon, just clear steps you can follow.

    Why Windows 11 Sound Stops Working

    Before jumping into fixes, it helps to understand what might be causing the issue. Windows 11 sound problems usually happen due to one of these reasons:

    • Incorrect audio output device selected
    • Muted sound settings or low volume
    • Outdated or corrupted audio drivers
    • Windows update bugs
    • Disabled audio services
    • Hardware issues like faulty headphones or speakers

    Once you identify the cause, fixing it becomes much easier.

    Start With the Basics

    It may sound obvious, but many sound issues come from small oversights.

    First, check your volume level. Click the speaker icon on the taskbar and make sure it is not muted. Increase the volume and test again.

    Next, confirm that the correct output device is selected. If you have multiple devices like headphones, Bluetooth speakers, or HDMI audio, Windows may be sending sound to the wrong one.

    To check this:

    • Click the speaker icon
    • Select the arrow next to the volume slider
    • Choose the correct audio device

    You would be surprised how often this simple step solves the problem instantly.

    Restart Your Computer

    A quick restart can fix temporary glitches that affect audio services. If your sound suddenly stopped working, this is often the fastest solution.

    Restarting refreshes system processes and resets audio components without any manual effort.

    Run the Windows Audio Troubleshooter

    Windows 11 comes with a built in troubleshooter that can automatically detect and fix audio problems.

    Here is how to use it:

    • Open Settings
    • Go to System
    • Click Troubleshoot
    • Select Other troubleshooters
    • Find Playing Audio and click Run

    Follow the instructions on the screen. The tool will scan for common issues and apply fixes if possible.

    Check Sound Settings in Windows 11

    Sometimes, the issue lies within advanced sound settings.

    Go to Settings and then System followed by Sound. Under the Output section, ensure your device is selected and working.

    Click on your device and check these:

    • Make sure volume is not set to zero
    • Ensure audio enhancements are not causing issues
    • Verify format settings

    You can also test your sound directly from this menu.

    Update or Reinstall Audio Drivers

    Drivers are one of the most common causes of sound problems in Windows 11. If your audio driver is outdated or corrupted, your system may not produce sound at all.

    Update Drivers

    • Right click Start and open Device Manager
    • Expand Sound video and game controllers
    • Right click your audio device
    • Select Update driver

    Choose automatic search and let Windows find the latest version.

    Reinstall Drivers

    If updating does not work:

    • Right click your audio device in Device Manager
    • Select Uninstall device
    • Restart your computer

    Windows will automatically reinstall the driver after reboot.

    This often fixes deeper issues that simple updates cannot.

    Restart Windows Audio Services

    Audio services manage how sound works in your system. If they stop running, your sound will stop too.

    To restart them:

    • Press Windows key plus R
    • Type services.msc and press Enter
    • Find Windows Audio
    • Right click and select Restart

    Also check Windows Audio Endpoint Builder and restart it as well.

    This can instantly restore sound in many cases.

    Disable Audio Enhancements

    Audio enhancements can improve sound quality, but sometimes they cause conflicts.

    To disable them:

    • Open Settings
    • Go to Sound
    • Select your output device
    • Turn off Enhance audio

    After disabling, test your sound again.

    Check App Specific Volume Settings

    Download Windows 12 Iso allows different volume levels for each app. Sometimes, the system sound works, but a specific app remains silent.

    To fix this:

    • Go to Settings
    • Open Sound
    • Click Volume mixer

    Check if the app you are using is muted or set to a very low volume.

    Fix Sound Issues After Windows Update

    Many users face audio problems after updating Windows 11. Updates can sometimes reset drivers or change settings.

    If your sound stopped working after an update:

    • Roll back the audio driver from Device Manager
    • Check Windows Update for additional patches
    • Reconfigure your sound settings

    Rolling back often restores the previous stable driver version.

    Check Hardware Connections

    Do not ignore physical issues.

    If you are using external speakers or headphones:

    • Ensure cables are properly connected
    • Try a different port
    • Test with another device

    For Bluetooth devices:

    • Disconnect and reconnect
    • Remove and pair again

    Sometimes the issue is not software at all.

    Set Default Audio Device

    If Windows is confused between multiple devices, setting a default device helps.

    • Go to Settings
    • Open Sound
    • Scroll to Advanced
    • Click More sound settings
    • Right click your preferred device
    • Select Set as Default

    This ensures Windows always uses the correct output.

    Fix No Sound in Specific Apps

    If only certain apps have no sound, the issue might be app related.

    Try these steps:

    • Restart the app
    • Check app specific audio settings
    • Update the app
    • Reinstall if needed

    For browsers, also check tab mute settings.

    Use System Restore

    If your sound was working fine before and suddenly stopped, system restore can help.

    • Search for System Restore
    • Choose a restore point from when sound was working
    • Follow the instructions

    This will revert your system settings without affecting personal files.

    Reset Windows 11 Sound Settings

    As a last resort, resetting your sound settings can fix persistent issues.

    • Go to Settings
    • Open System
    • Click Sound
    • Scroll down and reset settings

    You can also reset the entire PC if the issue is severe, but this should only be done when nothing else works.

    When Nothing Works

    If you have tried everything and still have no sound, it may be a hardware issue.

    In this case:

    • Test with different speakers or headphones
    • Check if your sound card is working
    • Visit a technician if needed

    Hardware failures are less common but still possible.

    Tips to Prevent Future Sound Issues

    Once your sound is working again, you can avoid future problems by following a few simple habits:

    • Keep your drivers updated
    • Avoid installing unreliable software
    • Regularly check Windows updates
    • Do not change advanced settings unless necessary

    These small steps can save you from repeating the same issue.

    Final Thoughts

    Fixing Windows 11 sound problems does not have to be complicated. Most issues come down to settings, drivers, or simple glitches that can be resolved with a few clicks.

    If you follow the steps in this guide, you will likely restore your sound without needing professional help. Start with the basics, move step by step, and you will find the solution.

    Audio is a big part of your daily computer use, so it is worth taking a few minutes to get it working properly again.

  • Repair Corrupt Windows 11 System Files Fast

    Repair Corrupt Windows 11 System Files Fast

    Windows 11 is designed to be fast, stable, and visually modern. But even with all its improvements, system file corruption is still a common issue many users face. If your PC is crashing randomly, apps are not opening properly, or you are seeing strange error messages, there is a good chance that some system files have been damaged or gone missing.

    The good news is that you do not need to be a tech expert to fix this. Windows 11 already includes built in tools that can scan, detect, and repair these issues. In this guide, you will learn practical and proven methods to repair corrupt Windows 11 system files and bring your system back to normal.

    What Causes System File Corruption in Windows 11

    Before jumping into the fixes, it helps to understand why this problem happens in the first place. Knowing the cause can help you avoid it in the future.

    One of the most common reasons is improper shutdowns. If your computer loses power suddenly or you force shut it down frequently, important system files can become corrupted. Malware or viruses can also damage files or replace them with malicious versions.

    Another cause is failed Windows updates. Sometimes updates do not install correctly, leaving files incomplete or broken. Disk errors, outdated drivers, and even software conflicts can also play a role.

    In short, system file corruption is not unusual, and it can happen to anyone. What matters is how you fix it.

    Signs Your Windows 11 System Files Are Corrupt

    You might not always see a clear message saying your files are corrupt. Instead, you will notice unusual behavior such as:

    • Frequent system crashes or blue screen errors
    • Slow performance and freezing issues
    • Apps failing to launch or crashing instantly
    • Missing features or broken settings
    • Error messages during startup

    If you are experiencing any of these problems, it is time to check your system files.

    Method 1: Run System File Checker (SFC)

    The System File Checker is the easiest and most effective tool to repair corrupt system files. It scans your system and replaces damaged files with a cached copy.

    Steps to Run SFC

    1. Click on the Start menu and search for Command Prompt
    2. Right click and choose Run as administrator
    3. Type the following command and press Enter

    sfc /scannow

    The scan will begin and may take some time depending on your system. Do not close the window while the process is running.

    What Happens Next

    Once the scan is complete, you will see one of the following messages:

    • Windows Resource Protection did not find any integrity violations
    • Windows Resource Protection found corrupt files and successfully repaired them
    • Windows Resource Protection found corrupt files but could not fix some of them

    If the tool fixes the files, simply restart your PC and check if the problem is resolved.

    Method 2: Use DISM Tool to Repair System Image

    If SFC is unable to fix all issues, the next step is to use the DISM tool. DISM stands for Deployment Image Servicing and Management. It repairs the Windows system image, which SFC relies on.

    Steps to Run DISM

    Open Command Prompt as administrator and run the following commands one by one:

    DISM /Online /Cleanup-Image /CheckHealth

    DISM /Online /Cleanup-Image /ScanHealth

    DISM /Online /Cleanup-Image /RestoreHealth

    Each command serves a purpose. The first checks for issues, the second scans in detail, and the third repairs them.

    Once the process is complete, restart your computer and run the SFC command again for best results.

    Method 3: Check Disk for Errors

    Sometimes the issue is not just the system files but also the storage drive. Bad sectors or disk errors can lead to file corruption.

    Steps to Run Check Disk

    1. Open Command Prompt as administrator
    2. Type the command below and press Enter

    chkdsk C: /f /r

    You may be asked to schedule the scan on the next restart. Type Y and restart your PC.

    This process can take some time, but it helps fix underlying disk issues that may be causing file corruption.

    Method 4: Perform Windows Startup Repair

    If your system is not booting properly, Startup Repair can help fix critical files.

    How to Access Startup Repair

    1. Restart your PC and interrupt the boot process three times
    2. This will open the Windows Recovery Environment
    3. Go to Troubleshoot > Advanced options > Startup Repair

    Follow the on screen instructions and let Windows fix the problem automatically.

    Method 5: Reset Windows 11

    If none of the above methods work, resetting Windows can be the final solution. This will reinstall the operating system and replace all system files.

    Steps to Reset Windows

    1. Go to Settings
    2. Click on System and then Recovery
    3. Select Reset this PC
    4. Choose whether to keep your files or remove everything

    This method is powerful, but it should be used only when necessary.

    Tips to Prevent System File Corruption

    Fixing the problem is important, but preventing it is even better. Here are some simple habits that can keep your system healthy:

    Keep your Windows updated regularly to avoid bugs and vulnerabilities. Use a reliable antivirus program to protect against malware. Avoid force shutting down your PC unless absolutely necessary. Make sure your drivers are updated and compatible with Windows 11.

    Also, consider creating regular backups. This way, even if something goes wrong, your data remains safe.

    When to Seek Professional Help

    If you have tried all the methods and your system is still unstable, it might be time to seek professional help. Hardware issues such as failing SSDs or RAM can also cause corruption, and these require expert diagnosis.

    Final Thoughts

    Dealing with corrupt system files in Windows 12 Iso File can feel frustrating at first, especially when your computer is not behaving as expected. But in most cases, the built in tools like SFC, DISM, and Check Disk are more than enough to solve the problem.

    The key is to follow the steps carefully and give each method enough time to complete. With a bit of patience, you can restore your system and get back to a smooth computing experience.

    Taking a proactive approach by maintaining your system and avoiding risky actions will also go a long way in preventing future issues. Windows 11 is a powerful operating system, and with the right care, it can run reliably for years.

  • Fix Windows Boot Loop in Windows 10 and 11 Fast

    Fix Windows Boot Loop in Windows 10 and 11 Fast

    A Windows boot loop can feel like your computer is stuck in an endless cycle. The system tries to start, fails, and then restarts again without ever reaching the desktop. If you have ever faced this issue, you already know how frustrating it can be, especially when you have important work waiting.

    The good news is that most boot loop problems in Windows 10 and Windows 11 are fixable without needing professional help. With the right steps, you can diagnose the issue and get your system back to normal.

    This guide walks you through practical and tested solutions that real users rely on. Whether the issue started after an update, driver installation, or unexpected shutdown, you will find a clear path to fix it.

    What Is a Windows Boot Loop

    A boot loop happens when your PC keeps restarting during the startup process. Instead of loading the login screen, it gets stuck repeating the same cycle.

    You may notice symptoms like:

    • Windows logo appears and disappears repeatedly
    • Automatic Repair screen keeps showing up
    • Black screen followed by restart
    • PC restarts before loading desktop

    This issue can be caused by software conflicts, corrupted system files, faulty drivers, or even hardware problems.

    Common Causes of Boot Loop in Windows

    Before jumping into fixes, it helps to understand what might be causing the problem.

    1. Corrupted System Files

    If essential Windows files are damaged or missing, the system cannot complete the startup process.

    2. Failed Windows Updates

    Sometimes updates do not install properly, leaving your system unstable.

    3. Driver Conflicts

    A newly installed or outdated driver can crash the system during boot.

    4. Malware or Viruses

    Malicious software can interfere with startup processes.

    5. Hardware Issues

    Faulty RAM, hard drive errors, or loose connections can also trigger boot loops.

    Step 1: Force Enter Windows Recovery Environment

    When your PC cannot boot normally, you need to access the recovery tools.

    Turn your PC on and force shut it down as soon as the Windows logo appears. Repeat this process two to three times. Windows will automatically open the Recovery Environment.

    Once you see the recovery screen, select:

    Troubleshoot → Advanced options

    This is where most fixes begin.

    Step 2: Use Startup Repair

    Startup Repair is the easiest fix and should be your first option.

    Go to:

    Advanced options → Startup Repair

    Windows will scan your system and try to fix startup issues automatically. This process may take a few minutes.

    If it works, your PC will restart normally. If not, move to the next method.

    Step 3: Boot into Safe Mode

    Safe Mode loads Windows with only essential drivers. This helps you identify if the issue is caused by software or drivers.

    From Advanced options:

    Startup Settings → Restart

    After restart, press 4 or F4 to enter Safe Mode.

    Once inside Safe Mode:

    • Uninstall recently installed apps
    • Remove problematic drivers
    • Run antivirus scan

    If your PC works fine in Safe Mode, the issue is likely caused by software.

    Step 4: Uninstall Recent Updates

    If the boot loop started after a Windows update, removing it can solve the problem.

    Go to:

    Advanced options → Uninstall Updates

    You will see options like:

    • Uninstall latest quality update
    • Uninstall latest feature update

    Start with the latest update and check if the issue is resolved.

    Step 5: Run System File Checker

    Corrupted system files are a common reason behind boot loops.

    Open Command Prompt from Advanced options and type:

    sfc /scannow

    This command scans and repairs damaged system files. It may take some time, but it often fixes the issue.

    Step 6: Use DISM Tool

    If SFC does not fully fix the problem, use the DISM tool.

    In Command Prompt, enter:

    DISM /Online /Cleanup Image /RestoreHealth

    This command repairs the Windows image and improves system stability.

    Step 7: Perform System Restore

    System Restore takes your PC back to a previous working state.

    Go to:

    Advanced options → System Restore

    Choose a restore point created before the issue started. This can undo recent changes without affecting your personal files.

    Step 8: Check Disk for Errors

    Hard drive issues can also cause boot loops.

    Open Command Prompt and type:

    chkdsk C: /f /r

    This scans your disk for errors and attempts to fix them. It may take longer if your drive has many issues.

    Step 9: Disable Automatic Restart

    Sometimes Windows keeps restarting before showing the error.

    Go to:

    Advanced options → Startup Settings → Restart

    Then press 9 or F9 to disable automatic restart.

    This allows you to see the actual error message, which helps in diagnosing the issue.

    Step 10: Reset Your PC

    If nothing works, resetting Windows 12 Iso Download is the last software based solution.

    Go to:

    Troubleshoot → Reset this PC

    You can choose:

    • Keep my files
    • Remove everything

    Keeping files is usually safer, but backing up data is always recommended.

    When to Check Hardware

    If all software fixes fail, the problem may be hardware related.

    Check the following:

    • RAM sticks are properly seated
    • Hard drive is not failing
    • No loose cables inside the system
    • External devices are disconnected

    If you recently installed new hardware, try removing it temporarily.

    Tips to Prevent Boot Loop Issues

    Once your system is fixed, it is important to prevent the issue from happening again.

    • Keep Windows updated but avoid interrupting updates
    • Install drivers only from trusted sources
    • Use reliable antivirus software
    • Avoid forced shutdowns
    • Create regular restore points

    These small habits can save you from major headaches later.

    Real World Insight

    Many users face boot loops after power cuts or incomplete updates. In most cases, Startup Repair or Safe Mode fixes the issue quickly. What matters is staying calm and following steps one by one instead of trying random solutions.

    If you are dealing with this problem for the first time, it might feel technical, but the process is more straightforward than it looks.

    Final Thoughts

    A Windows boot loop in Windows 10 or Windows 11 is frustrating but not permanent. With built in recovery tools and a bit of patience, you can bring your system back to life without losing data.

    Start with simple fixes like Startup Repair and Safe Mode, then move toward advanced tools like SFC and DISM if needed. Only consider resetting your PC when other options fail.

    By understanding the cause and applying the right solution, you can fix the issue efficiently and keep your system running smoothly.

  • Best Windows 10 and 11 Customization Tools

    Best Windows 10 and 11 Customization Tools

    There is something deeply satisfying about turning a standard Windows desktop into a space that feels truly yours. Whether it is a clean minimal workspace for productivity or a vibrant setup full of widgets and live visuals, customization brings personality to your PC. Windows 10 and Windows 11 both offer built in personalization options, but they barely scratch the surface of what is possible.

    If you have ever looked at those stunning desktop setups online and wondered how people create them, the answer is simple. They use the right customization tools.

    In this guide, we will walk through the best Windows customization tools that can transform your desktop experience. These tools are beginner friendly, powerful, and widely trusted by users who want more control over their system’s look and feel.

    Why Customize Windows at All

    Before jumping into the tools, it helps to understand why customization matters.

    A personalized desktop is not just about aesthetics. It can improve your workflow, reduce distractions, and even make daily tasks more enjoyable. For example, placing useful widgets on your screen can save time, while a clean layout can help you focus better.

    Many users also customize their systems simply because they enjoy it. It becomes a creative process, similar to designing your own workspace.

    1. Rainmeter

    Rainmeter is easily one of the most popular desktop customization tools available for Windows. If you have seen desktops with weather widgets, system monitors, or stylish clocks, chances are Rainmeter was used.

    It allows you to add customizable skins to your desktop. These skins can display information like CPU usage, RAM usage, weather updates, music players, and more.

    What makes Rainmeter special is its flexibility. You can download pre made skins or create your own if you have some technical knowledge.

    Key highlights
    Highly customizable widgets
    Large community support
    Thousands of skins available
    Lightweight performance

    Rainmeter is perfect for users who want full control over their desktop appearance without compromising performance.

    2. Start11

    Windows 11 introduced a redesigned Start menu, but not everyone liked the changes. Start11 gives you the ability to bring back the classic look or create something entirely new.

    It lets you customize the Start menu layout, taskbar style, and overall navigation experience. If you miss the familiarity of older Windows versions, this tool is a great choice.

    Key highlights
    Custom Start menu layouts
    Taskbar customization
    Easy to use interface
    Works smoothly on Windows 10 and 11

    Start11 is ideal for users who want a balance between modern design and classic usability.

    3. Wallpaper Engine

    Static wallpapers are fine, but animated wallpapers take your desktop to another level. Wallpaper Engine allows you to use live wallpapers that respond to movement, sound, or even system activity.

    From subtle animations to full motion backgrounds, the options are nearly endless. It also supports user created wallpapers through its workshop.

    Key highlights
    Live and interactive wallpapers
    Supports video and 3D backgrounds
    Huge library of community content
    Optimized for performance

    If you want your desktop to feel alive, Wallpaper Engine is worth trying.

    4. Winaero Tweaker

    Winaero Tweaker is designed for users who want deeper control over Windows settings. It provides access to hidden features and advanced customization options that are not available through standard settings.

    You can tweak system behavior, adjust privacy settings, and modify visual elements.

    Key highlights
    Access hidden Windows features
    No need for registry editing
    Lightweight and efficient
    Wide range of tweaks

    This tool is especially useful for power users who want to fine tune their system.

    5. Lively Wallpaper

    Lively Wallpaper is a free alternative to Wallpaper Engine that offers similar functionality. It supports animated wallpapers and allows you to use videos, web pages, or GIFs as your background.

    The best part is that it is open source and completely free.

    Key highlights
    Free and open source
    Supports multiple wallpaper formats
    Easy to set up
    Good performance optimization

    For users who want dynamic wallpapers without spending money, Lively Wallpaper is a solid option.

    6. TaskbarX

    TaskbarX is a simple yet effective tool that centers your taskbar icons and adds smooth animations. It gives your desktop a clean and modern look similar to macOS or updated Windows designs.

    While Windows 11 already centers icons by default, TaskbarX offers more customization options.

    Key highlights
    Center taskbar icons
    Add smooth animations
    Lightweight tool
    Custom positioning options

    It is perfect for users who want a minimal and stylish taskbar.

    7. Fences

    Fences helps you organize your desktop icons by grouping them into sections. If your desktop often feels cluttered, this tool can make a big difference.

    You can create labeled areas and automatically sort icons based on type.

    Key highlights
    Organize desktop icons
    Create custom groups
    Hide icons instantly
    Improve productivity

    Fences is ideal for users who want a clean and organized workspace.

    8. WindowBlinds

    WindowBlinds allows you to completely change the look of Windows by applying custom skins. This includes window borders, buttons, and overall interface design.

    It goes beyond simple themes and gives you full control over the visual style of your system.

    Key highlights
    Apply custom visual styles
    Wide range of skins
    Easy customization
    Regular updates

    If you want your Windows system to look entirely different, this tool delivers.

    9. PowerToys

    PowerToys is developed by Windows 12 Iso Download and includes a collection of utilities that enhance productivity and customization.

    It includes features like FancyZones for window management, keyboard remapping, and file preview enhancements.

    Key highlights
    Official Microsoft tool
    Improves productivity
    Regular updates
    Free to use

    PowerToys is not just about looks. It also improves how you interact with your system daily.

    10. TranslucentTB

    TranslucentTB makes your taskbar transparent or blurred, giving your desktop a modern and polished appearance.

    It works seamlessly in the background and does not consume many resources.

    Key highlights
    Transparent taskbar effects
    Simple setup
    Lightweight tool
    Compatible with Windows 10 and 11

    This is a small tool, but it adds a noticeable visual upgrade.

    How to Choose the Right Tool

    With so many options available, choosing the right customization tools depends on your needs.

    If you want visual enhancements, focus on tools like Rainmeter and Wallpaper Engine.
    If you prefer better organization, Fences and TaskbarX are great choices.
    For advanced system control, Winaero Tweaker is a strong option.
    If productivity matters most, PowerToys is essential.

    You do not need to install everything. Start with one or two tools and build your setup gradually.

    Tips for Safe Customization

    Customization is fun, but it should also be done carefully.

    Always download tools from official sources
    Create a restore point before major changes
    Avoid installing too many tools at once
    Keep your system updated

    These simple steps can prevent issues and ensure a smooth experience.

    Final Thoughts

    Customizing Windows 10 and 11 is more than just changing wallpapers or colors. It is about creating a workspace that feels comfortable, efficient, and uniquely yours.

    Whether you are a beginner experimenting with widgets or an advanced user designing a fully customized setup, the tools listed above can help you achieve your vision.

    Start small, explore different styles, and enjoy the process. Over time, you will discover what works best for you and your daily workflow.

    Your desktop is something you look at every day. With the right customization tools, it can become a space that inspires you instead of just serving as a default screen.

  • Change Icons and Folders in Windows 11 Easily

    Change Icons and Folders in Windows 11 Easily

    Windows 11 brought a fresh, modern look, but not everyone loves the default icons and folder styles. Some people prefer a minimal aesthetic, others want something colorful, and many simply want better organization. The good news is that Windows 11 gives you plenty of control over how your system looks. With a few simple steps, you can completely transform your desktop experience.

    This guide walks you through everything you need to know about changing icons and folders in Windows 11. Whether you want to replace a single folder icon or apply a full theme across your system, you will find practical steps and tips here.

    Why Customize Icons and Folders in Windows 11

    Before jumping into the steps, it helps to understand why customization matters. It is not just about looks.

    A well organized desktop saves time. When folders have unique icons, you can instantly recognize them without reading labels. This becomes especially helpful if you work with many files daily.

    Customization also makes your system feel more personal. Instead of using the same default design as everyone else, you can create a workspace that matches your style and workflow.

    For many users, it is a small change that makes a big difference in daily productivity.

    How to Change Folder Icons in Windows 11

    Changing a folder icon is one of the easiest customization options available.

    Start by locating the folder you want to modify. Right click on it and select Properties. A new window will appear. From there, go to the Customize tab.

    Inside this tab, you will see an option labeled Change Icon. Click on it. Windows will show a list of available icons. You can pick one from the list or browse your computer for custom icon files.

    Once you select your desired icon, click OK and then Apply. Your folder icon will update instantly.

    If the change does not appear right away, try refreshing your desktop or restarting File Explorer.

    Using Custom Icons for Better Personalization

    The default icons are useful, but custom icons give you more flexibility.

    You can download icon packs from trusted websites. These packs usually come in ICO format, which is supported by Windows. Once downloaded, you can use the Browse option in the Change Icon window to select your custom file.

    Many users create folders for work, personal projects, or media. Assigning different icons to each category makes navigation faster and more intuitive.

    Just make sure to store your icon files in a safe location. If you move or delete them later, Windows may revert to the default icon.

    How to Change Desktop Icons in Windows 11

    Windows allows you to change system icons like This PC, Recycle Bin, and Network.

    To do this, open Settings and go to Personalization. Then click on Themes and look for Desktop icon settings.

    A small window will appear with a list of system icons. Select the one you want to change and click Change Icon. Choose a new icon and apply the changes.

    This is a great way to make your desktop look consistent if you are using a custom icon pack.

    Changing File Type Icons in Windows 11

    Changing file type icons is a bit more advanced. Windows does not provide a direct option for this in settings.

    To modify file icons, you may need third party tools such as FileTypesMan or similar software. These tools let you assign custom icons to specific file formats like PDF, JPG, or TXT.

    While this adds another layer of customization, be careful when using third party software. Always download from trusted sources and avoid making unnecessary changes to system files.

    How to Change Drive Icons

    You can also customize the icons for your drives.

    This process involves editing the system registry or using tools that simplify the process. One common method is to create an autorun file with a custom icon, but this is less common in modern Windows versions.

    A safer approach is to use customization tools that handle these changes without requiring manual registry edits.

    Tips for Choosing the Right Icons

    Not all icons are created equal. Picking the right set can improve both appearance and usability.

    Choose icons that are clear and easy to recognize at smaller sizes. Overly detailed icons may look good in previews but become hard to identify on the desktop.

    Stick to a consistent style. Mixing flat icons with realistic ones can make your desktop look cluttered.

    Also consider color coding. For example, you might use blue icons for work, green for finance, and red for urgent tasks.

    Common Issues and How to Fix Them

    Sometimes, icon changes do not apply correctly. This can happen due to cache issues.

    If your icons are not updating, try clearing the icon cache. Restarting File Explorer often solves the problem as well.

    Another common issue is missing custom icons. This usually happens when the original icon file is moved or deleted. Keeping your icon files in a dedicated folder can prevent this.

    If something goes wrong, you can always restore the default icon through the same settings menu.

    Best Free Icon Resources

    Finding quality icons can take time, but there are several reliable sources available.

    Websites like Flaticon, Icons8, and Iconfinder offer a wide range of icons in different styles. Many of them provide free options for personal use.

    When downloading icons, look for ICO format or convert PNG files using online tools.

    Always check licensing terms if you plan to use icons for commercial projects.

    Creating Your Own Icons

    If you want complete control, you can create your own icons.

    Design tools like Photoshop, GIMP, or online icon generators allow you to create custom designs. Once finished, export the file as an ICO format.

    This approach is perfect if you want a truly unique setup or need icons that match your brand or workflow.

    Is It Safe to Customize Icons in Windows 11

    For the most part, yes. Changing folder and desktop icons through built in settings is completely safe.

    However, when using third party tools or editing the registry, proceed with caution. Avoid downloading files from unknown sources and always create a restore point before making major changes.

    Keeping things simple reduces the risk of errors while still giving you plenty of customization options.

    Final Thoughts

    Changing icons and folders in Windows 12 Download is one of the easiest ways to make your computer feel more personal and organized. You do not need advanced technical skills to get started. Even small changes can make a noticeable difference in how you interact with your system every day.

    Start with basic folder icons, then explore custom packs and deeper customization options if needed. Over time, you will build a setup that not only looks good but also helps you work more efficiently.

    If you spend hours on your computer, it makes sense to shape it into something that feels right for you. Custom icons are a simple step, but they go a long way in improving your overall experience.